
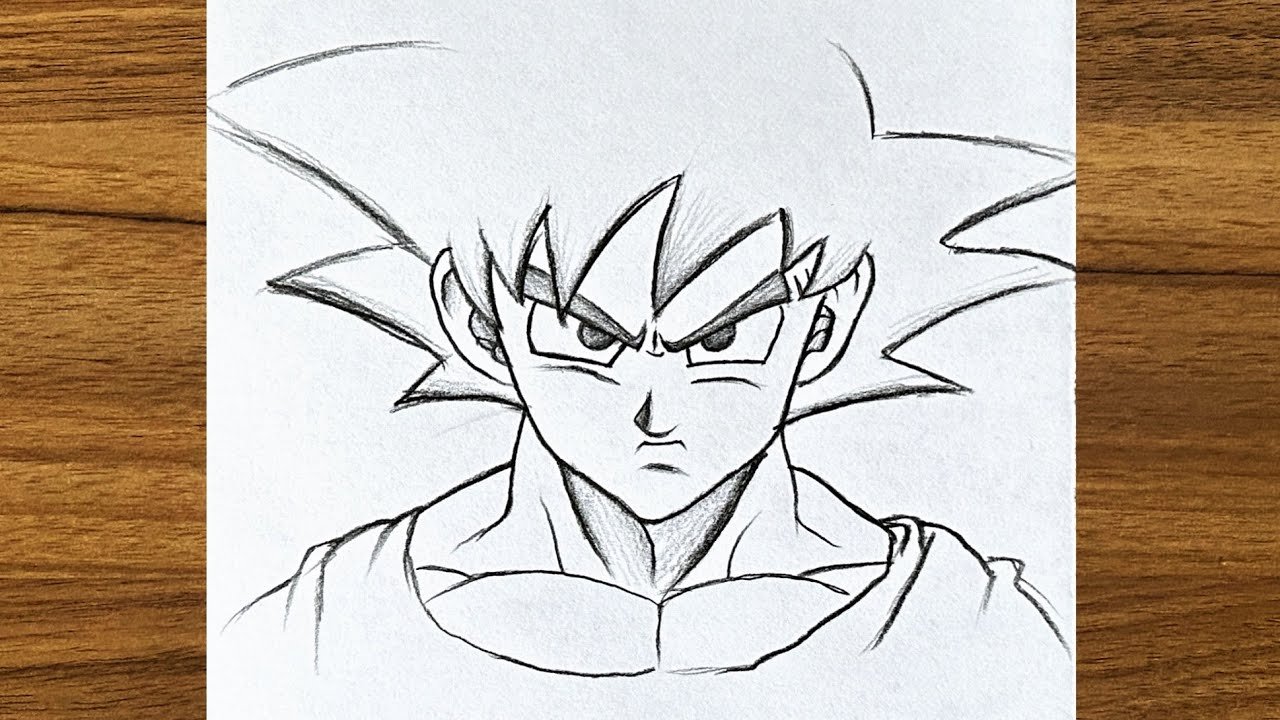
To draw Goku, start by sketching his iconic spiky hair and determined eyes. Next, outline his muscular body and signature orange gi. Refine the details by adding his distinctive symbols and accessories. Remember to capture his dynamic pose and energy aura for a true Goku representation. Practice shading and highlighting to bring depth to your drawing. Now, let’s dive into the step-by-step guide on how to draw Goku, and unleash your inner artist! Time to channel your Saiyan spirit and create your own epic Goku artwork.

How to Draw Goku: Step-by-Step Guide for Beginners
Introduction
Welcome to this fun and exciting guide on how to draw Goku, the legendary Saiyan warrior from the popular anime series Dragon Ball Z! If you’re a fan of Goku and want to learn how to bring this iconic character to life on paper, you’re in the right place. In this tutorial, we will walk you through easy-to-follow steps to help you master the art of drawing Goku. So, grab your pencils and let’s get started!
Materials Needed
Before we dive into the drawing process, let’s make sure you have all the necessary materials at hand. Here’s what you’ll need:
– A pencil
– An eraser
– Drawing paper
– Colored pencils or markers (optional for coloring)
Step 1: Basic Outline
To begin drawing Goku, start by sketching a rough outline of his head and body. Remember, it’s okay if your initial outline looks a bit messy – this is just the first step! Use light, gentle strokes with your pencil to map out Goku’s basic features, such as his spiky hair, large eyes, and muscular physique.
Pro Tip: Don’t worry about getting everything perfect in the beginning. Drawing is all about practicing and making improvements along the way!
Step 2: Adding Details
Once you have the basic outline in place, it’s time to start adding details to bring Goku to life. Focus on refining his facial features, such as his eyes, nose, and mouth. Pay close attention to the unique characteristics that make Goku recognizable, like his trademark spiky hair and confident expression.
Pro Tip: Take your time with this step and use an eraser to make corrections as needed. The key is to capture Goku’s essence and personality in your drawing.
Step 3: Shading and Texturing
Now that you have the main features of Goku sketched out, it’s time to add depth and dimension to your drawing through shading and texturing. Use your pencil to create light and dark areas, giving Goku’s hair and clothing a realistic look. Experiment with different shading techniques to enhance the overall quality of your drawing.
Pro Tip: Start by shading lightly and gradually build up the darkness as needed. This will help you achieve a more natural and three-dimensional effect in your artwork.
Step 4: Final Touches
As you near the completion of your Goku drawing, take a moment to review your work and make any final adjustments. Check for any areas that may need additional shading or detailing to make Goku stand out. Once you’re satisfied with the overall look of your drawing, you can choose to add color using colored pencils or markers for a vibrant finish.
Pro Tip: Have fun experimenting with different colors to personalize your Goku drawing. Get creative and make Goku your own unique creation!
Conclusion
Congratulations! You’ve successfully learned how to draw Goku, the mighty Saiyan warrior, from scratch. Remember that drawing takes practice and patience, so don’t be afraid to keep honing your skills and exploring your creativity. Whether you’re a beginner or an experienced artist, drawing Goku is a fun and rewarding activity that allows you to express yourself through art. Keep practicing, keep learning, and most importantly, keep enjoying the process of creating your own masterpiece inspired by the world of Dragon Ball Z!
How to draw Goku step by step || Easy drawing ideas for beginners || Beginners drawing
Frequently Asked Questions
What are the essential steps to drawing Goku accurately?
To draw Goku accurately, start by sketching the basic outline of his body, focusing on his muscular physique. Pay attention to details such as his spiky hair, signature orange gi, and boots. Use references from the Dragon Ball series to capture Goku’s unique features, such as his facial expressions and fighting poses.
How can I improve my Goku drawing skills as a beginner?
As a beginner, you can improve your Goku drawing skills by practicing regularly. Start by studying Goku’s character design and practicing basic shapes and proportions. Utilize online tutorials and step-by-step guides to learn specific techniques, such as shading and detailing. Don’t be afraid to make mistakes and continue refining your skills through experimentation.
What tools are recommended for drawing Goku effectively?
For drawing Goku effectively, it is recommended to use quality pencils of varying hardness for sketching and shading. Invest in good erasers to correct mistakes and achieve clean lines. Consider using colored pencils or markers to add vibrant colors to your Goku artwork. Additionally, using reference images or digital tools can help in capturing Goku’s likeness accurately.
Final Thoughts
To draw Goku, begin by sketching the basic body shape and adding details like his spiky hair and distinctive clothing. Refine your drawing by emphasizing muscle definition and facial features. Practice shading to give depth and dimension to your artwork. Remember, patience and practice are key when learning how to draw Goku. Mastering his iconic look will take time, but with dedication, you can capture the essence of this beloved anime character. Start with simple steps, and gradually refine your technique for a successful portrayal of Goku in your drawings.